Category Archives: Geek

F42 Is A Flash


Sony HVL-F42AM mass order TT session at Tarita Low Yat. 15 out of 30 units already bought! Great success!

Somewhere along the line, somebody came with a poisonous item.


80mm F2.8. Somebody is happy to see a white lens!


200mm F2.8. Yeah it’s the Minolta 80-200mm F2.8G HS APO.


80mm F2.8. Poisonously 3D-ish lens which feels better balanced than any other F2.8 tele you’ve ever tried (except the Minolta 200mm F2.8G HS APO.)


80mm F2.8. “This is how you adjust your eye’s diopter…


35mm F1.4. This was shot with another hazardously poisonous lens, the Minolta 35mm F1.4 (Original).


Left to right are three Minoltas: Minolta 70-210mm F4 “beercan”, Minolta 80-200mm F2.8G HS APO, Minolta 35mm F1.4 Original.


Left to right are three Original-era Minoltas: Minolta 50mm F1.4, Minolta 70-210mm F4 “beercan”, Minolta 35mm F1.4.

I love how they all looked very, very consistent. They all looked like miniature versions of the beercan!


The Sony Carl Zeiss 135mm F1.8 felt heavier than the Minolta 80-200mm F2.8G HS APO, surprisingly.

Married Scar-rung!


Kevin a.k.a. Broken Scar at the KL Performing Arts Centre Open Day, 27th January 2008.


Check out his red sunnies! (Shot with the Cosina 70-210mm F2.8-4 at 210mm F7.1; one of the rare occasions where its bokeh turns out nicely.)


Jangan tak rock!


150mm F5.


210mm F5.6 versus…


…50mm F1.4.

Dude, you didn’t tell me that you got married! Congratulations (though I wouldn’t have been able to make it for the Melbourne one hehe.)


Oh well, at least there was a wedding next to the gig that I could crash!


Ooo, who’s getting hitched?


Where’s my date?


Where’s our pianist?


Where’s our bridegroom?


Inside, I spotted a Leica M8 digital rangefinder. Whoa.


White. Sweet.


And don’t go around breaking young boys’ hearts.


What a reception.

Speed Triumphs

This blog entry makes history as an update within 12 hours of the event itself. On the 5th of April 2008, I went to One Utama for the Triumph fashion show and geekout with Sony Alpha owners.


All shots with the Minolta 70-210mm F4 beercan except this shot. Seen is a Canon 300mm F2.8. I have no idea what he was intending to shoot…


…at 210mm it was already very tightly framed!


Look at the crowd in the background. Yeah, that’s what the beercan does – it has the famed classic Minolta bokeh.


I somehow like the mood of this shot.


I caught someone else’s flash.


She looks… restricted.


At some point, one designer decided to cosplay his models.


Angel with a cold stare.


This bra apparently transforms into a shopping bag. I’d like to see a live demonstration of this!

And now, to geekout:


tshop‘s amazing Canon BP-200 mod as a Sony A100 battery grip! Way neater than the other versions I’ve seen because his wire is flat.


That is the coolest looking flash bracket I’ve seen, only because it’s circular. I forgot what the other one was but it was spring-loaded.


Major respect to this Pentax user with the Pentax 50-135mm F2.8 lens – this is the lens I’ve been telling people to get instead of a heavier 70-200mm F2.8 which was meant for full-frame and would be too long for events and not wide enough at times.


Canon 70-200mm F4L non-IS next to the Minolta 70-210mm F4 beercan. I honestly don’t understand why it’s so much bigger for the same range… and the Canon doesn’t have IS inside, even.


1100mm F16 1/25s ISO1600

From Burger King One Utama, we could snipe into rooms at One World Hotel using my Tamron 200-400mm F5.6 + 1.4x + 2x teleconverters. Problem is, nobody puts a light to their faces, as it’s hard to see past a window when it lowers contrast.


Alpha males.

Sony Alpha 350 Launched!


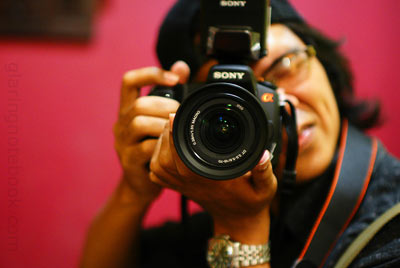
The Sony Alpha 350 with Quick AF Live View!

After going around and testing Live View on digital SLR cameras from different brands, I could say that the 14.2 megapixel A350 (and its little brother the 10.2 megapixel A300) gives the best ‘version’ of Live View possible – you turn on Live View, you half-press to autofocus (which you can see in Live View) and you full-press to shoot.


(Picture stolen from dpreview.com)
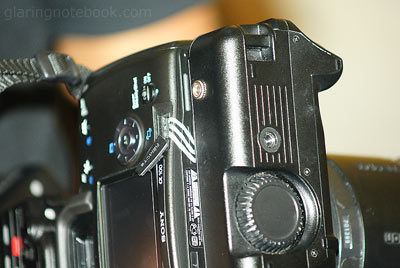
A Pentamirror Tilt Mechanism makes this all possible, by tilting a mirror so the image from the lens goes into a separate Live View sensor instead of the viewfinder.

Stay Focused

With any other brand, you either press the AF On button to focus using the AF sensors (requiring the Live View to go off) or you press the AF On button to focus using the sensor (requiring a very long time to focus, unlike a SLR is supposed to be.)

Also, the A350 is the only implementation that allows continuous auto-focus in Live View! However, it comes at a penalty of 2 FPS in Live View instead of 2.5 FPS on the A350 and 3 FPS on the A300.

Screen It!

In terms of screen, the articulating swivel screen on the A350 really helps – it’s a 2.7″ 320×240 LCD screen. It is a tie between that and the Olympus E-3, which has a 2.5″ 320×240 LCD screen which can swivel out to the front to shoot self-portraits. Then again, there’s also the Nikon D300/D3 with a 3″ 640×480 LCD screen but this cannot swivel.

Keep It Warm And Chill

This is a minor and yet major feature which many brands neglected – Live View to show changing of Kelvin White Balance. That is, you can tweak Kelvin White Balance while looking at the Live View screen at the same time.

With the Pentax K20D and Canon 40D, you cannot see it at the same time; it’s in a menu.

On the Olympus E-3, you can, but it’s tricky to get there, and the menu blocks your view.

With the Sony A350 however, the Kelvin setting is displayed on the left while you dial through the temperature, to help you get the color you want.

I have not tried this on a Nikon D300 but I’d expect Nikon to have thought of this. I cannot find any literature on the Internet that says if it can or can’t. Isn’t this a cool feature?

(You also get to see the exposure, so you can compensate exposure accordingly if the camera decided to expose darker or brighter.)

Refresh Rate

I’ll be honest – in dim light, the A350’s Live View appears to have a lower refresh rate than in bright conditions. Side-by-side with the Olympus E-3, the E-3 was slightly faster… and the 40D was smoother, but not exactly super responsive either. However, it’s understandable that the A350 has a tiny sensor hidden up in the viewfinder…

This, and the 320×240 LCD, are the only downsides I can really find to the A350. I’d be okay with a 320×240 screen if I hadn’t been so used to the 3″ 640×480 LCD of my Sony A700.

Smart Teleconverter

The Smart Teleconverter, a new feature, and a new button on the A350, gives you either 1.4x or 2x cropping off the center of the image. This drops your resolution from 14.2 megapixels to 7 megapixels or 3.5 megapixels… but it keeps the brightness.

Therefore, I can foresee myself using this at a concert, shooting the action overhead a tall stage, with a 50mm F1.4 and 2x Smart Teleconverter to give me a 3x crop factor or 150mm F1.4 equivalent. Yes, there’d be no light loss, and the shutter speed would stay the same, unlike a physical, optical teleconverter!

The Price Is Nice

Seriously. RM2999 Recommended Retail Price with the Sony 18-70mm F3.5-5.6 DT kit lens.

The 10.2 megapixel Sony A200 with 18-70mm F3.5-5.6 DT kit lens goes for RM1999, if you’re not convinced.

(And yes, this is not a sponsored post – I registered as media and am responsible to give media coverage. I would put this in Xfresh, God bless you if you remember me from there, is a bit out-of-scope already. 🙁 In fact, technical articles on my blog get more views than back over there.)

Enough With The Features Already!


So I went for the Sony Alpha 350 launch at Sime Darby Convention Center, April 2nd 2008.


It was a scorching day, and Dynamic Range Optimizer Level 5 on the A700 helped quite a bit with this. The slight halo around the building was my fault, I tried to dodge it in Photoshop carelessly.


1/5th of a second at 17mm. Hail Super SteadyShot!


Naoi Sudo, Managing Director of Sony Malaysia, shot with the Sony Carl Zeiss 135mm F1.8 with my Kenko 2x teleconverter, for a 280mm F3.5 ISO1600 1/160s exposure.


George Wong, yo! Shot with the Minolta 50mm F1.4 with my 2x teleconverter, for 105mm F3.5 ISO1600 1/125s exposure.


Spot the Alpha!


Displays in the dark – yes you might’ve read it right on the right – free “Basic Photography with Alpha” Sony workshops. You get to win stuff, too!


Displays in the light, with some familiar faces.


This is how they displayed the A350 – with a Sony Handicam pointed at it! You can see the output on the screen on the wall on the left.


Likewise.


And finally, what we’d been waiting to see – something new and unreleased in Malaysia! The Sony Carl Zeiss 24-70mm F2.8 SSM. (Note that the hood is borrowed from the Carl Zeiss 135mm F1.8, which vignettes from 35mm and wider.) The Sony 70-200mm F2.8 G SSM’s hood does not vignette no matter what, but this might be different on full-frame.

I won’t post any samples from the lens though, as it’s a pre-production unit and won’t reflect on the final lens you can buy. However, I can say that this is the fastest-feeling, snappiest SSM lens I’ve tried so far – the Sony 70-200mm F2.8 G SSM, like other motorized teles from Canon and Nikon, don’t feel that responsive as a screw-driven lens. It’s also helped by the wide range of the lens. At 24mm F2.8, it was scorchingly sharp! Depending on subject distance too, 70mm was crisp.


Sigma 17-35mm F2.8-4 EX ultra wide-angle lens (left) and Sony Carl Zeiss 24-70mm F2.8 SSM (right).

It was not as big and fat as some made it out to be – just chunky like a wide-angle lens, but with a solid shell. Kinda like the Carl Zeiss 135mm F1.8, but lighter… somewhat like the Minolta 28-70mm F2.8 G lens. It added a AF/MF switch, a first for any Sony lens.


(Picture for another future blog entry.)

The Minolta 28-70mm F2.8 G in comparison, was slow-focusing (faster on the A700 but not superb) and had a minimum focusing distance of 85 cm. It had internal zoom and internal focus. More on that in a later blog entry!

The Carl Zeiss 24-70mm F2.8 SSM was very fast, with a minimum focusing distance of 34 cm for a maximum 1:4 magnification. Without a doubt, way preferred to ye olde Minolta. The only drawback would be the extending zoom… but it does look kinda cute, y’know.


Oh, and of course, there were Sony 300mm F2.8 G SSM lenses perched outside. I compared it to the Minolta 200mm F2.8 G HS APO (which I christened The White Torchlight, a lightweight 790 gram wonder… but that’s another blog entry.) The 300mm F2.8 meanwhile is 2310 grams.


Guess that trashcan!

Gestalt Entry

Alright time for some pictures. Though this picture is still very geeky in nature as it shows a combination of several hacks:


Minolta Dynax 7 with transplanted Vivitar 24mm F2.0 tilt-shift and Seagull iISO to ISO hotshoe adapter, and optical slave trigger, and Nikon SB-28 with externally wired battery pack.

The ISO adapter, optical slave trigger and Sony strap were from Digicolor, Mutiara Complex, Mile 4, Jalan Ipoh, for very cheap! Go there for some great bargains.


This is how I lit it. RM5 silver-inside umbrella from Masjid Jamek, clipped with wire rope clips (RM6.50) on RM40 tripod. Sony HVL-F56AM pointed at center of umbrella in Manual Power, which triggered the SB-28 on the camera… which bounced into the cardboard standing on the right. That way you get the highlights on the right.

Note that I had to shield my camera’s pop up flash from the SB-28 using my hand… but making sure it still is seen by the F56 flash.

So how did I put the SB-28 on my Dynax 7, which has a different flash mount? I used this:


It’s a Minolta/Sony iISO hotshoe to standard ISO hotshoe adapter with PC Sync port on the side.

This makes your Minolta/Sony bodies compatible with the ISO hotshoe everybody uses… and it adds PC Sync port support for studio lights. * note that the Sony A700 and Minolta pro/advanced amateur series have this already.

It said RM29 but I got it for cheaper. 😉


This is a Remote Shutter Cable, RM65. Good for tripod shooters and people who want to do HDR.

Note that A700 users don’t need this, as the A700 already comes with a remote control that does Bulb mode.

And now for the new Sony HVL-F42AM GN42 (105mm at ISO100) flash:


Note the very bright, vibrant, shadow-less light? It’s because I was taking a picture and forgot that wireless was on, so it fired a very powerful blast at the wall, which formed a very big surface area, making a very, very soft light.

Knowing how to bounce your light onto HUGE surfaces is far more important than buying any diffuser for your camera, trust me. That’s why people always point their flashes to the ceiling.


Rear panel, greatly improved – manual power and a fully articulate flash head added to the F36, built-in wide-angle diffuser, plus a zoom of up to 105mm instead of 85mm on the F36. Oh and the Test button, for whatever reason you’d need it for… 🙂

Same retail price as the F36. Street price would be cheaper in Sg. Wang!


Nope, still using 4 AA batteries, no funky Sony Lithiums yet. It would be interesting though. Oh and for some reason, the F42 looks like a black version of Transformers character Blurr.


A proud owner of a new Sony A200. Wireless flash from his 12 o’ clock and one more flash at about his 8 o’ clock (spot an Ian holding a flash in the mirror!)

Dynamic Range Optimizer, Level 5

All Sony Alpha digital SLRs have a Dynamic Range Optimizer feature which helps to bring out details in shadows and highlights. The default settings are Off, DRO Standard and DRO Advanced.

However, on the A700, there are 5 more levels, for manual customization, and often, at Level 3, you get a stronger effect than with DRO Advanced.


Aperture Priority, 17mm F5.6 1/800s ISO200, DRO off.


Aperture Priority, 17mm F5.6 1/800s ISO200, DRO Level 5.


Aperture Priority, 17mm F8.0 1/250s ISO200, DRO off.


Aperture Priority, 17mm F8.0 1/250s ISO200, DRO Level 5.

What it does simply, is change the ISO for certain areas of the image, brightening it smarter than most Photoshopping can or will do. This saved me from hours of dodging and burning! (Though I enjoy that activity, heh!)

Of course, there are limitations – having DRO on slows down your burst shot framerate slightly as the camera has to process the pictures. Also, if you’re shooting at ISO1600, the darker spots that get brightened by say DRO Level 5 will have its noise become very, very obvious. However, DRO Level 5 is awesome in bright daylight and contrasty conditions.

Many Eyes


There is a kit lens, a Peleng 8mm F3.5 circular fisheye, a Sony Carl Zeiss 16-80mm F3.5-4.5, a Sony 70-200mm F2.8G SSM (on Nic‘s A700 + VG-C70AM, look at the number of buttons on the grip), a Sony Carl Zeiss 135mm F1.8 on an A100, a Minolta 70-210mm F4 “beercan” on a Sony A350 and a Tamron 200-400mm + 1.4x + 2x teleconverters on a Sony A200.

This was before we went to Putrajaya for something which I will not document in full geekiness just yet.


KJ the invisible tripod-mounted man.


I can do the moonwalk!


And now, for some real cool shit.


No wait, in slow motion.


Stuntman 101: Escaping the explosion.


KJ does the remix.


Nic jumps.

DIY Tilt-Shift!


I present to you my finest work of camera modification – the Vivitar 24mm F2.0 Olympus OM-mount lens, adapted to the Minolta/Sony Alpha mount!


My beloved Vivitar 24mm F2.0 wasn’t stopping down properly, after a few operations in the past year, so it was time to change its mount from the Olympus Zuiko OM mount to the Alpha mount which I use. It was a favorite on my Olympus OM-2000, and will continue living a well-used life!


So, I unscrewed the back of the Vivitar and placed the spacer on my Sony body cap to get the alignment right, then drilled. I intended to just replace the rear mounting with the body cap, using the same screws… but found that the body cap was too thick, so it could not focus to infinity.


Hence, I had to remove another layer, including the aperture ring, off the lens. Now it could focus to infinity, but the screw holes did not match anymore! Then, I found, the lens could shift about in place, and tilt about… I had made a 24mm F2.0 tilt-shift lens!

Yeah, eat that, Canon and Nikon, which only offer a 24mm F3.5 tilt-shift. 😀

The red tape is used to hold it in place; if not, it would pop out too easily. Another layer of red tape was applied underneath the main layer so there are no exposed sticky surfaces.


My sad OM-2000 with the leftover parts from the lens.


So what does a tilt look like? Like this, yo!


Happy (belated) Birthday Rames! Note just where is in focus… there’s another point in focus near the corner of the table, defying normal focus rules.


Note where is in focus – the railing near me, and the railing in the middle of the train!


Shoe and distorted focus plane.


Extreme shifting, with the body cap removed, can cause trippy effects and excessive light leakage.


A sideways tilt can narrow the field of focus, with pleasant effects to lights.


Tilting changes the shape of bokeh! The lens is quite notorious for bright-line bokeh, but nothing too unpleasing.


Ted took this.


Justin with his Sony Alpha 100, doing the tilt-shift. Note the left-hand grip allows for minute adjustment in angle.


George explaining something. Oh and Happy Birthday smashpOp!


Same distance, different blurring.


Ramli burger stall. I think this is without the body cap.


Yes, one can camwhore with it without adjusting focus, as it hangs out just enough for close focus. I was on a custom WB for this one, and got this by accident.


24mm on APS-C crop gives a very nice, natural 36mm angle of view on 35mm film. This is the same as on handphone cameras and standard digital cameras. Only slightly wide.


With extreme tilting without the body cap, flare can and will intrude.


The radial blurring is probably one of the qualities of this lens that I’d want to get more often. Shifting required to get the center of the radial blurring off the center.


From up at Masjid Jamek STAR LRT station.


Extreme tilting, for toy-like effect.

Bent On Part 2


Chamang waterfalls, Bentong, part 2. (Part 1 here.) Again, Dynamic Range Optimizer cranked up to Level 5 on the Sony Alpha 700.


17mm F3.5 ISO6400 1.6 seconds with a RM90-equivalent pure infrared-pass filter.


KJ decides that carrying a tripod above his head is the best way to lower the center of gravity. Perhaps, in the world of fisheyes…


And this is how you estimate exposure…” No, he doesn’t have a built-in lightmeter. Learn the Sunny F16 rule folks!


Leaves.


Like a mushroom.


Sunroof.


Somewhere up, above the rocks, was a sight to behold.


Fresh, fresh water!


I am no abseiler.


There is another shot with XJ sitting on this rock, but that was so wrong, too.


KJ the adventurous.


I owe Asyraf this picture.


This is what happens when two photographers meet…


…they chimp.

Of course, older screens did badly in sunlight… which is when I realized how good the transreflective screen on the A700 is. You can clearly see the picture (and settings) even in scorching bright sunlight!


Moments like these, you’d wish you had a 10 FPS camera to have twice more frames and a higher likelihood of catching the impact of the frisbee upon his head. Still, you can see the effect of the frisbee. What a classic series of 3 pictures, though!