Category Archives: Geek

Surprise In Film

This blog post will have no pictures, and you will find out why later.

Many surprise birthday parties have been thrown for friends; often, out of unsuspecting dinner invites a few days before the actual date, to avoid suspicion.

And so, I knew damn well that the days before my birthday were those I should be most aware of, so I don’t sound as hysterical or dumbfounded as any of these friends. (But I certainly avoided “Throw me a surprise birthday party will you guys? As many celebrations as my age?“)

Probably the only person I know who didn’t get majorly surprised (or had a hunch) was stim-girl. Boohoo.

Anyway.

I sat at my office workstation, cursing the slow Internet connection, when the lights tripped and a cake came out. I turned back and sung along, “Happy birthday…” thinking it was Aaron or Rizal’s birthday or something.

Oh, right. Me!

There it was, a… smaller-sized cheesecake. (Thank my diabetic tendencies that it’s tiny; finishing cakes is hardly in fashion.)

I got 6 rolls of ISO 400 film as a present from colleagues. Thanks dudes!

Now, what was sublime and ethereal about these 6 rolls was that it was not a want. It was almost a need. I was going to buy two 3-packs of ISO 400 film anyway, for Rock The World 7.

They could’ve given me that to find out that I’d already gotten film. But no! Such perfect, perfect timing! God bless them, and God blessed my wallet!

Very practical, too! (I don’t know what to do with functionless memorabilia. Damn pink elephants.)

Jenifur, if you masterminded such a gift suggestion, I salute you. You’ve had a track record of choosing the most matching gifts for friends. Go start a service and charge people, yo.

After work, I got off at KL Sentral. Walking past a camera shop, I figured I might as well develop the two rolls of film I had, and get them to burn it to CD.

When it was time to collect, I saw two strands of blank film hanging from their machine. “Uh sorry sir, your film didn’t advance.” When I loaded the film, I put it over the notches and under the uh… advancer, but I didn’t make sure that the film was stuck firmly in. Sure, the film advance lever would crank and make a sound, and the film counter would increase, but the film didn’t move.

There goes my Moonshine-in-film shots. 🙁 (Of course, there’s always Moonshine-in-infrared, Moonshine-in-slow-shutter-flash…)

I got them to show me how to load the film and lock it in place. When advanced properly, the film rewind lever would turn together with each crank. Oh, and I got the Olympus OM-2000 back, and the shutter-clicking-after-advancing-film bug was fixed. However, a new one came – even when the film advance lever was in the lock position, I could still press the shutter and take a picture! (So now I don’t advance the film until I intend to take a picture.)

Well, at least I learnt it then, rather than after 6 blank rolls at Rock The World 7. 😀

As Al Are


Down the yellow brick road, from Keat Camera to YL Camera in Pudu Plaza.


Kingsley‘s uncle’s Yashica Electro 35 GSN rangefinder (click for manual) was out of juice. The PX32 5.6 volt battery originally used was no longer sold as it had mercury inside; so, we had to improvise using a CR123A 3 volt battery, padded with two 1.5 volt LR44 batteries. We put it in, in that order, and it didn’t work… until we figured that the LR44 batteries were upside down (in this picture, negative is up.)


(Pardon the graininess, this was a cropped picture.)

The Yashica was a cheap rangefinder with a fixed 45mm F1.7 Color Yashinon lens that could not be changed. However, it came with a wide-angle and tele converter. We could not see the double-image until Desmond pointed out that it was the faint yellow image. (The second image had a yellow plastic over it.) This image could only be seen when pointing at lights!

I was disappointed. So what was the big deal about rangefinders anyway, other than the quiet leaf shutter sound and luxuriously-marketed lenses? Neither image was through the lens, so you could take pictures with your lens cap on and not know it. Also, you do not get depth-of-field preview (similiarly, choosing a darker aperture does not darken either image.) That answered my question.

Anyway.


I bought the Olympus OM-2000 with Olympus 35-70mm F3.5-4.8 lens and Olympus 70-210mm F4.5-5.6 one-touch push-pull zoom lens. (Seen on left is the Vivitar 24mm F2.0 for Olympus Zuiko mount; having that lens alone made me choose an Olympus system.)

(And yes, unlike Grace and Tan Yee Hou who went from Olympus digital cameras to Canon digital SLRs, I went from a Canon digital camera to an Olympus film SLR. Heh.)

The Olympus OM-2000 isn’t a true Olympus SLR; it did not have the shutter speed dial on the lens mount itself or the Olympus porroprism viewfinder (which makes it shorter since there’s no prism on top). It was actually made by Cosina; it is very similiar in design to the Cosina E1 Solar (minus the solar cell and depth-of-field-preview button, plus the spot metering, something rare that time on a cheap student’s camera.) (Click for manual.)

Yes, it’s a film SLR. Not a digital SLR. I figured, if I go manual, I might as well go all the way manual. Everything, except the lightmeter (which uses two LR44 batteries) is manual. The film is winded in manually. The film is advanced manually using a film advance lever. When the film has reached its end, you’d have to manually wind it back into the film canister. The shutter speed and aperture are set manually (there’s no Program or Aperture Priority mode; it’s like Manual Exposure all the time.) There is no autofocus. There is no LCD screen (since frame count, shutter speed and aperture are all visible outside.)

Thank goodness there’s the shutter speed dial, which goes from 1/2000th of a second to 1 second, plus Bulb mode (for those 4-hour-long star tracking shots which digital SLRs would just burn up and die trying to shoot.) Oh, and the curtain speed is 5.8-6.1ms.

What about popular digital SLRs? Canon 400D? 100ms. Canon 30D? 65ms. Nikon D70s? 106ms. Nikon D80? 80ms. Interestingly, the Sony W1 has a 9ms shutter lag. (Click for more.)


You can actually see what’s behind the viewfinder when the mirror is down. Don’t worry about dust, as there’s no sensor, and the film is protected by a metal shutter. (Digital SLRs should also have metal shutters, but I guess dust swims around inside.)


You can’t do this with a digital SLR. 😀 (Inspired by Xian Jin when he was testing my camera.)


More camwhoring.


Eye spy.


Solid, heavy metal.


Sadly, there was a major problem with the shutter mechanism; when the film advance lever was cranked, the shutter would sometimes trigger! If I held it out (anti-clockwise) it would hold the mirror up and shutter open, thus overexposing the film. There’d also be camera shake. If I cranked and quickly released, it would expose with the correct shutter speed, so if it was on a tripod when I crank it, it would look alright.

Fazri tried cranking it too; sometimes, it worked perfectly, sometimes, it would trigger itself at every crank. My luck with it was mostly at every alternate crank. Desmond of YL Camera offered to fix it, but I figured I’d take the camera for one 36-frame Fuji ISO200 round before getting it fixed.

And so, before every shot, I’d frame, focus, set the exposure, and crank the lever. If the shutter didn’t trigger itself, I’d press the shutter. 😀

It was only after sending the camera to be fixed that I realized that I could’ve saved on accidental exposures by using the multiple-exposure lever. How?

1. Cover the lens with its cap.
2. Crank the film advance lever.
3. If shutter triggers, hold down the multiple-exposure lever (which stops the film from advancing) while cranking it again. If shutter triggers, repeat step 3.
4. Remove lens cap.
5. Frame picture, set aperture and shutter speed until lightmeter says it’s good, and press shutter.

The ISO film speed dial is interestingly hidden under the shutter speed dial; I’d have to pull it up to change it. Unlike digital cameras, ISO sensitivity is set by the film in the camera itself. The ISO dial is just to tell the camera what ISO it is, so it can calculate and tell you whether your picture will be exposed properly. You can fool it by setting ISO 400 on the dial while using ISO 200 film, to underexpose all shots by 1 stop (if you find that the camera’s lightmeter isn’t accurate.)


Split prism rangefinder focusing screen. Make manual focus real fun; the center of the screen has a circle which is split in half; you focus by turning the focus ring until the top half aligns with the bottom half of the circle. It also tells you which way to turn; clockwise to move the upper half to the right and the lower half to the left, for example.

This does not have the quiet air-dampened sound of the true Olympus cameras, and Xian Jin said that it sounded quite loud. If I was adventurous I’d drill an air tunnel which has holes on both sides of the mirrors, to dampen the sound. More interesting reads are in the interview with Yoshihisa Maitani.

Olympus has an obsession with making their cameras and lenses as small as possible; it was no wonder that they chose the Four Thirds system, which had 2x crop factor (very similiar to their half-frame Pen F series), allowing smaller, shorter telephoto focal length lenses, like the cheap 40-150mm F3.5-4.5 zoomer, which gives a 80-300mm equivalent! 300mm at F4.5! What a bargain! At a tiny 52mm screw thread size too!

Sadly, the Zuiko Digital lenses are focus-by-wire, so I’m doubtful of its manual-focus capability. If I got an Olympus E-330 with Live View (and Live View B has the mirror up, making it work just like my Fujifilm Digital Q1) I would get the Olympus Zuiko-to-Four-Thirds-adapter and use my old manual focus lenses on it, since those have true dampened manual focus.) Live View B mode does not have auto-focus.

I haven’t heard of image stabilization mode on any Four Thirds lenses or camera bodies so that cancels out this option. (Sigma intends to support Four Thirds in 2007, and they have Optical Stabilizer coming up.) Plus the 2x crop factor gives a really dark screen, with a smaller sensor and more noise.


From left to right: Cosina 19-35mm F3.5-4.5 MC Pentax-K-mount lens, my superglued 52mm-to-K-mount adapter, UV filter, Hoya R72 filter, 49-52mm step-up ring, Seagull 50mm F1.8 MC Minolta-MD-mount lens, my superglued 52mm-to-Minolta-MD-mount adapter, Hoya 25A red filter, Raydawn circular and linear polarizers, Olympus 35-70mm F3.5-4.8 lens, my superglued 52mm-to-Olympus-Zuiko-mount adapter, Olympus 70-210mm F4.5-5.6 lens, Olympus OM-2000.


This combination can actually see something; the Vivitar 24mm F2.0 reversed, with my superglued 55-52mm reverse adapter.


The Olympus mount can fit the Seagull 50mm F1.8 MC lens, albeit loosely, with some added distance. It makes the lens somewhat macro and unable to focus on infinity. Same went for the Cosina, which was trippingly wide and macro.


This is just disturbing. The infrared-modded Fujifilm Digital Q1 with Olympus 70-210mm F4.5-5.6 lens meets the reverse adapter of the Vivitar 24mm F2.0 on the Olympus OM-2000.

I sold the Cosina to Tan Yee Wei who has a Ricoh KR-10 Super Pentax-K-mount SLR and could fully enjoy its 19mm wideness. I threw in the Hoya 2x K-mount teleconverter which I got for free as well as I had no more Pentax-K-mount lenses.

I wish I didn’t superglue the spring inside my Vivitar 24mm F2.0 lens; now when I choose a darker aperture and take a picture, I have to wind it back to F2.0 to open it again. Also, the aperture blades may not close fast enough in time for the exposure (which may cause overexposure and less depth-of-field than intended.)

For more scanned manuals, click here.


Of course, I attached the 70-210mm to my Fujifilm Digital Q1; who could resist the idea of 1260mm equivalent zoom?


Left to right, top to bottom: Railway platform step at 210mm; focused differently; a satellite receiver in a petrol station; a streetlamp; an old lady looking wistfully at traffic passing Pudu Jail; KL Tower; a couple, stalked from Pudu STAR LRT (note it’s the she that’s on the steering wheel handle); the M dial on my Canon Powershot A520 (using the Vivitar 24mm F2.0 on reverse.)


This was originally cropped to 460×422 pixels before resizing to 400×367! It is easier to get 1/2000th of a second at 7:45am, when the moon is still up but the sky is bright enough to fool the camera. I also set EV -2 to underexpose it correctly. I also used the Hoya 2x K-mount teleconverter to get a whopping 2520mm, giving a 840×840 pixel moon, but that setup could not focus on infinity and was thus considerably more out-of-focus than this one.

Next in the camera geeking series: The film prints! (Yeah, I printed them already; the Vivitar 24mm F2.0 has horrible vignetting.) And nope, the camera shop isn’t done with it yet.

We? We Tar.

Remember the Seagull 50mm F1.8 MC Minolta MD-mount lens I had for my infrared-modded Fujifilm Digital Q1 camera? It now has a prime companion, the Vivitar 24mm F2.0 Olympus OM-mount lens.

Assuming ISO400 sensitivity:

Compared to a 50mm F1.4, it has the same darkness performance, giving steady shots at absolute EV4.66. How so? The F2.0 would be one stop darker than the F1.4… but because it is one stop wider (to be exact, 25mm is one stop wider) it can use one shutter speed stop slower. Bokeh is two stops smaller, but it’s a practical walkaround lens. The Nikkor 28mm F1.4D is the most expensive wide prime, which can shoot in EV4, merely 2/3rds of a stop darker than this 24mm F2.0. (A Canon 50mm F1.2L lies halfway between, in terms of dark performance at EV4.33.)


Top, from left to right: Fujinon 50mm F1.4 EBC lens (Fujica mount but without lens body), Seagull 50mm F1.8 MC Minolta MD-mount lens, Vivitar 24mm F2.0 Olympus OM-mount lens, Cosina 19-35mm F3.5-4.5 MC Pentax K-mount lens, 35mm-equivalent manual focus webcam lens.
Below: The Seagull (left) is joined by the Vivitar.


This time around, I made an effort to document approximately where I should set the manual focus to camwhore at arm’s length.


The Olympus OM mount is unique – the depth-of-field (DOF) preview button is on the lens, not the body; the lens release button is on the lens as well. However, the lens I bought had a problem – the DOF preview button did not work. So I’d be stuck at F2.0 all the time. And so, I opened the lens, taking care to separate screws of different layers, by putting them on different filters (top row).


The underside of the rear-most piece; on top is the DOF preview button, which pushes the lever; below is the lens release button.


I then removed the aperture ring (on left) and a tiny ball bearing dropped out onto the lens. Arrow denotes where it came from; the ball runs along the notches on the lens, to make the clicks you feel on your aperture ring.


Finally, the root of the problem! It took me a while to figure out what controlled the aperture, since a DOF preview system is complicated and has a few springs. The problem was that the spring on the left was supposed to pull a lever (in the middle, nearer to the lens) that closed the aperture blades. The spring did not have enough tension to pull the lever!


Note the loose spring in the bottom-left corner; the hook was loose. This lens had 6 circular aperture blades.


After toiling about, I decided to superglue the spring solidly to the mechanism! I removed the other spring that returned the lever to open the aperture blades. The downside was that once I had pressed and released the DOF preview button, the aperture would stay closed. Fortunately, I could open the aperture by turning the aperture ring.

I suppose the spring weakened because the previous owner tried to forcefully press the DOF preview button while the lens was at F2.0. The DOF preview button, I found, was supposed to provide resistance; it should only travel all the way down if the aperture was at F16. You should only be able to half-press it at F2.0, at which point the springs would stop you.

I also suppose that the previous owner (or someone unfamiliar with the camera) tried to press the DOF preview button while at F2.0, thinking it was the lens release button. Since it didn’t dislodge he/she would’ve pressed harder, breaking the spring. Ouch! I wonder if any other Olympus OM system users have this problem. I hope Google leads all you broken-DOF-button-Olympus-users here!

I prefer the rear diaphragm lever method used by every other non-digital lens.


And now, a group photo from left to right: infrared-modded Fujifilm Digital Q1, and them lenses in order of brightest to darkest, coincidentally going wider, too.


The infrared-modded Fujifilm Digital Q1 puts on the 24mm F2.0 after the fixing. Note the screw in the rear lens cap; it locks the lens in place. The button with grooves is the lens release button. I don’t know why, but with this lens-to-sensor distance I can focus closer than the lens says, and yet focus beyond infinity.

I had to reopen the lens when I pressed the DOF preview button and weakened the spring. More superglue!

I had to reopen the lens again when it seemed to be focusing close; the lens was too far out despite being screwed all the way back in. The giant screw thread that connects the lens to its housing has a few entry points! Enter the wrong one, and the lens will have the wrong distance and thus lack the correct focusing range.


Alright, enough of the tech talk. I’m stoked to have opened and fixed my own lens mechanism!


24mm with a crop factor of 6x gives a 144mm equivalent focal length.


Okay, so the depth of field is nothing to shout about.


However, reversing the 24mm in front of my Canon Powershot A520 at 140mm equivalent, closest manual focus, gave the image on the left. The right-side image is from the reverse Fujinon 50mm F1.4.


This might put a scale to things; text was typed on my phone; focus was not changed with lenses.


So how’d I choose the lens to use?

The Seagull 50mm F1.8 is great for performances and shooting candid shots from a distance. The Vivitar 24mm F2.0 is usable, twice as wide, but not a stalker lens. The Cosina at 19mm is the widest I have… but F3.5 seems rather dark, and it seems sharper at the 35mm F4.5 end!

I say it’s dark because the Fujifilm Digital Q1 is very basic, lacking ISO sensitivity control. It will only go to ISO200 if it is at 1/15th of a second and can’t budge (the slowest it will go.)

Perhaps when I’m free, and it’s bright, I’ll compare the Cosina at 24mm at F8 versus the Vivitar at 24mm F8.

You could also say that I don’t have an allegiance to any camera/accessories brand; I have:

Cameras: Canon, Fujifilm, Nikon Coolpix 2200 (in repair)
Filters and rings: Hollywood, Hoya, Pixel, Raydawn, Toshiba, Vanguard
Lens mounts: Fujica, Minolta MD, Olympus OM, Pentax, 52mm screw thread
Lenses: Cosina, Fujinon, Seagull, Vivitar
Memory cards: Fujifilm, Kingston, Nokia, Olympus, Transcend

Oh, and GP batteries. Yeah.

Ran Them Through November

Stock clearance of more pictures from ages ago.


Food for thought.


What lies beyond?


Fans of fans.


Light a window.


Brick truck.


Ampang Park LRT station looks gorgeous.


Titiwangsa LRT station.


Is there anybody on the line?


Communicating through phone lines.


Why’d they have such a big toilet in Avenue K?


…I wonder.


Later outside.


Show your support.


Some camera pr0n.


My version of camera pr0n; the infrared-modded Fujifilm Digital Q1 with a Seagull 50mm F1.8 MC lens, 49-52mm step-up ring, my usual set of 52mm filters, the adapter to Pentax K-mount, the K-mount Hoya 2x Teleconverter, and a Cosina 19-35 F3.5-4.5 MC K-mount lens.


Similiar, but replacing the Cosina with Xian Jin‘s Tamron 70-300 F4-5.6 Nikon F-mount lens.

Mercury Rising

Mercury recently passed the Sun, a rare astrological event, which I could’ve captured from dawn (6:57am), 9th November 2006 until uh… well, I can’t seem to be able to Google the exact time, for once.

I stayed up, taking a quick nap (thanks Athena for staying up with me and giving a wake-up call!) I took a stroll around my neighborhood at 6:30am. It was already bright, but I could not find the sun anywhere!

But first, some shots around my place.


Coconuts!


Old cars!


Cranes!


Birds up for the sunrise!


The moon! I used the infrared-modded Fujifilm Digital Q1 with the Seagull 50mm F1.8 Minolta MC-mount lens on the Pentax-mount Hoya 2x Teleconverter with the Hoya R72 infrared filter, shooting with an EV of -2. Yes, they are not the same mount and are loose but I held them together anyway. Equivalent to 600mm, then cropped the sides to 960mm focal length.


In comparison, the Canon Powershot A520 went only this far with just cropping and not resizing.


Dammit, I thought, the sun was hiding behind clouds.


As it turns out, it really only came out at 6:57am.


The sun shows on the Fujifilm Digital Q1!


I could not capture the blip, not even with the Canon Powershot A520 with Hoya R72 infrared filter at 1/2000th of a second, F8.0, ISO 50 (as fast and dark as possible.)


Mercury could only be seen if you had the sun filling up at least 2000 pixels, where Mercury would be one pixel. I wish I thought of somehow getting the sun projected upon a surface which I could then capture in full resolution!


Different apertures make the sun look different; the CMOS sensor makes severely overexposed highlights… black. Stopping down the F1.8 lens shrunk the black part of it.

Areolas anyone? 😀


I then sat at this mamak, which never looked grander in daylight…


…or infrared. The sun flare came from the infrared filter, and cannot be avoided by putting a lens hood since the sun is in the picture too.

Zoom Zoom Ala Ka Moon

And so, on the 9th of November 2006, the indie gig known as Moonshine had its 1st year anniversary at Laundry Bar, The Curve.

It was also the perfect place to test my infrared-modded Fujifilm Digital Q1 with Seagull 50mm F1.8 lens! The spotlights were full of infrared, giving me 1/60th of a second at ISO 100, F1.8. (On my unmodded Canon Powershot A520, it was about 1/2th of a second at ISO 100, F2.8.)


Solsta* does the British 90’s wave. I remember them most for their excellent Supergrass cover during the second season of hitz.tv’s Blast Off (though a judge asked why they picked a song he had never heard before. Sir, have you not heard We Are Young?)


Reza Salleh has a showdown with sound engineer Leonard.


Reza Salleh and the Fumakillas; there he goes melting hearts again with his sexy voice, to 90’s modern rock.


Hanafi jangan tak solo!


Bittersweet from Ipoh was my favorite, playing very catchy British-tinged rock. You’ll point your fingers in the air and clap along, while stomping your feet.


I like how his sunglasses seem to vignette his face.


The crowd (okay, so I cheated and used my Canon. Look at the fans!)


When I first heard them, the following line came about my head: “Panic in the streets of London, panic in the streets of Birmingham… hang the deejay hang the deejay.” You know, that infectious Smiths stuff.


Force Vomit from Singapore also played Brit… rock? I’m not quite sure what genre, as they don’t sound like the current British revival but sound British anyway.


Rappers on the open mike.


Melodica was awesome! When you see a six-string green John Myung bass, you know you’ll be in for a treat. I swear I heard a Black Sabbath bassline somewhere in their soundcheck. They did instrumentals, ending with a cover of Deja Voodoo Spells – Arrhythmia! As it turns out, while the bassist was never with DVS, he did session with them. That does not account for the guitarist knowing the song note for note, double-tap for double-tap, though!


Never forget the next song with a setlist! (Taken from behind the glass behind the stage.)


Never forget your pedals, either!


Smek happy.


From like way, way out. The 300mm equivalent crop is fun.


There was an explosion outside, but all was calm soon.


The 300mm equivalent crop meant that I could take this from across a big room. Spot the Nicole who doesn’t look like her from first glance! (Eh, you don’t need glasses to look wise oh you enlightened-looking person.)


Others get up real close to the sound monitors; I’m glad I can shoot comfortably from such a distance.


Spot the Ivan.

I’d never had so much fun with my camera before, stuck at a 300mm equivalent (which is like 8x optical zoom for you point-and-shoot digicam owners) and manual focus. I could shoot people without them suspecting! Plus, the Q1 is deadly silent. It has no mechanical shutter (why do digital cameras have mechanical shutters anyway?), so the only sound you will hear when shooting is the shutter press. It does not have auto-focus so there’s no half-press either.

Also, despite it being 300mm equivalent, I didn’t get any motion blur at 1/30th of a second! It could be because the lens was really 50mm, with a 6x crop… or that there was no mechanical shutter or mirror to produce the slightest vibration, or that I was holding it mostly by the lens, where the Q1 was very light, thus shifting the center of gravity into the lens, reducing the effects of shake? I don’t know.

Conversely, you could add a lens hood, and perhaps a weight tied at the front of the lens, to counter the weight of the camera body!

Oh and there’s another show this Thursday!

What: Project Bazooka
Where: Laundry Bar, The Curve
When: Thursday 16th November 2006, 9:30pm
Who: Estranged, Frequency Cannon, Sizlomania
How much: FREE! But if you like a band’s music, go get their CD.

More details here.

Infrared-modded Digital Camera With SLR Lenses!

I had read about tilt/shift lenses, and how you could move the focus point. And so, I unscrewed the manual focus lens from my infrared-modded manual-focus Fujifilm Digital Q1, and held the Fujinon 50mm F1.4 lens in front of it like it was an SLR.


(The lens was stuffed inside my Canon Powershot A520 lens adapter, hence the appearance of a black tube.)

Viola! I could tilt it, and move the lens closer or further from the body to focus. (Of course, having space between the lens and sensor means that dust can get in. A safer way is to have a tube in between, or a bellows, or get yourself a Lensbaby.

Inspired by this macro infrared digicam project, I went around looking for wide old lenses with aperture rings and manual focus. (The Q1’s sensor is 6 times smaller than a full-frame sensor, giving it a crop factor of 6x. Thus, a standard 50mm lens would look like a 300mm.)

After finding YL Camera in Pudu Plaza, I saw a box that caught my eye – A Cosina 19-35mm F3.5-4.5 MC wide lens. The label above said “Nikon mount 19-35mm F3.5-4.5 like new“, so I checked it out. It was a clean lens, and I bought it for RM350.

A 19mm wide lens was rare in film SLR days; the widest it would usually go was 24mm. Any wider, and the lens would have to extend backwards into the mirror box, not a pleasant surprise when you find the mirror smashing into the rear element of the lens. I suspect that this 19mm lens achieved the wideness on the front, as the screw thread diameter was a whopping 77mm!

I asked for an extra back lens cap for the project. They tried a few Nikon caps, but none worked. A brandless one did, so I took that.

As I sat in Uncle Lim’s, Berjaya Times Square, inspecting my purchase, I read the instructions. Apparently, only the Nikon mount version had an aperture lock switch. Mine didn’t.

I checked the underside and then the side of the box – P! P for Pentax! The shop had mislabelled it. Thank goodness *I* bought it, and not some Nikon newbie who did not bring his/her camera along while buying this lens. No wonder none of the Nikon back lens caps worked!

I was originally thinking that I finally gave in and got a Nikon-mount lens (which would then make me get a Nikon.) Then when I found out it was a Pentax, I was disappointed that I could not mount any Nikon lens my friends had!

(Canon EF/EF-S lenses are out of the question as they don’t have aperture rings. Olympus has certain lenses that require you to press them to do stop-down metering; it does not lock for some reason.)


Left: The box; top-right: the back lens cap, which I sawed with a Swiss Army Knife ala V for Vendetta; bottom-right: the rear end of the lens, with the Pentax K auto-focus mount.

Pentax and Nikon were the only camera manufacturers to retain the same mount when introducing auto-focus lenses. A manual-focus lens would fit on their new auto-focus camera bodies. This lens also had a screw so that the camera could turn it and thus change the focus.


It had 8 circular aperture blades. Unfortunately, it closed down to a teardrop shape instead of a perfect circle, just like my Fujinon lens.


The ghosts from the table lamp I used above were interesting! They were… holographic? I wonder if I could count the number of ghosts and calculate the number of glass elements in the lens from that.


Anyway, it was time to marry the Q1 to the Cosina. Dr. Albert (Frank)einstein shaved off some plastic so he could glue a 55-52mm step-down adapter parallel to the sensor (top-left picture). The 55-52mm was picked over a 52mm to reduce distance from the sensor.

I then screwed on a 52mm filter, followed by a 52mm-to-Series-VII ring adapter. It looked like a 52-55mm step-up ring, but it is not compatible with 55mm rings (probably different thread thickness.) Anyway, the ring gave me enough space to swallow more of the rear lens cap I had cut earlier. (Refer to bottom-left picture.)

The rear lens cap was superglued to the 52mm-to-Series-VII ring; I could then screw them all together. The top-right picture shows it all in, minus the lens.

The Cosina, with its 77mm diameter, hides almost all of the camera! (Bottom-right picture.) All the more so with the lens hood attached.


From top, the complete setup, lens to camera: Cosina 19-35mm F3.5-4.5 MC Pentax K-mount lens, Pentax K-mount back lens cap (with a triangle cut), 52mm-to-Series-VII adapter ring (superglued to cap), Hollywood 52mm SKY-1A Skylight filter (glass removed), Hoya 55-52mm step-down ring (superglued to camera), infrared-modded Fujifilm Digital Q1.

The Hollywood filter was required to give the correct distance from lens to sensor so that I could focus apparently near and far. I did not measure how accurate it was, but it gave me the best range.

Through the LCD screen, it looked like a 114-210mm film equivalent zoom lens. Yes, the LCD screen. It was a SLR lens attached to a digital camera with Live View! No other digital camera, prosumer even, had true manual focus! It was great fun. Interestingly, the lens can focus nearer at 35mm than at 19mm.


(Click image for bigger version.)

Adding distance between the lens and sensor makes the camera short-focused (which is great for macro; stack a few rings so you can focus nearer still!)

These rings do not cause vignetting; as long as there is an infrared filter, adding polarizers and color filters would have no effect to the exposure.

Also note the added Hoya 2x Teleconverter (which I got from the friendly Jeff of Leos Com Trading in Ampang Park). It was dirty on the inside and was for manual-focus Pentax mount (it had corrective optics but no auto-focus screw) so it was quite… unwanted. Adding this made my lens a 38-70mm F7.0-9.0 zoomer.

But wait, that’s not all!


It was quickly joined by a Seagull Minolta MC-mount 50mm F1.8 lens which I found in Foto Selangor, Pertama Complex for RM100. However, being a Minolta MC manual-focus mount, it would not fit on Minolta AF mounts like the Alpha mount. smashpOp tried it on his Sony Alpha A100, and it was too loose.

Seagull was a Chinese company that made loads of imitations, often with aperture, zoom and focus rings turning the opposite way of normal lenses. In this case, everything was reversed compared to the Cosina.


Top-left: The Minolta MC mount; top-right: I cut a triangle in the back lens cap and superglued it to a 52mm Toshiba SL-1A Skylight filter; bottom-left: 6 straight aperture blades, more even for nice bokeh; bottom-right: it could loosely fit on the Pentax K-mount Hoya 2x Teleconverter, to make a 100mm F2.8!


The standard setup; Seagull Minolta MC-mount 50mm F1.8 lens, Minolta back lens cap (with triangular cut), 52mm Toshiba SL-1A Skylight filter (superglued to cap), Hoya 55-52mm step-down ring (superglued to camera), infrared-modded Fujifilm Digital Q1.

This baby was even more fun to play with. The lens was a real manual lens, not an auto-focus lens by build. Auto-focus lenses aren’t so fun because they’re lighter and often made of plastic (so the motor can focus them faster); they go from macro to infinity in a smaller turn of the focus ring; they don’t have depth-of-field scales to help you do hyperfocal focusing; and they don’t have that silky, viscuous dampened feel.

This was metal, and took a smooth 180 degree turn. Orgasmic.


The extended version with rings for extreme macro.

Speaking of macro, the Seagull reversed looks about the same to me on a reverse macro setup as my Fujinon 50mm F1.4.

But enough theory talk. We now go live, behind the screen of the Fujifilm Digital Q1.


Clockwise from top-left: Tilt/shift lens testing; more testing; the Fujinon 50mm F1.4 gives a 300mm equivalent crop, from ground level; it also crops the scenery.


Superfly!


…and busy bee.


I love how the Q1’s CMOS sensor distorts images when moving.


Clockwise from top-left: The first ever picture every SLR buyer takes (the lens cap!); the box taken with the Q1 and webcam manual focus lens; the box taken with the Q1 and Cosina lens at 19mm; me trying to camwhore at arm’s length at 19mm.


I found Keat Camera, and found this dirty push-pull zoom; it had low contrast. The second picture on the right is from another push-pull in Cash Converters, and the flourescent tubes are from Foto Selangor, Pertama Complex.


Clockwise from top-left: The Cosina at F3.5; stepping down to F22 shows how much dust has gotten on the sensor due to all my experiments; pointing at a bright light shows how bad it is; however, at bright apertures, it is not obvious.


At 35mm (210mm equivalent) and sunlight crashing in through the window, uh…


Top: camwhore is unaware that the Cosina is not very wide after all; bottom: Grace and I figure out how to camwhore at arm’s length with the Seagull.


Another mandatory shot – the look-ma-I-can-manual-focus-with-awesome-out-of-focus-areas shot. I can’t remember how I got the distortion in the lower picture.


Transformers Alternators Grimlock: Focus, dammit, focus!


I used the Seagull to take a picture of the Cosina with many rings; it appears to be white in infrared.


Seagull 50mm F1.8 shot.


45cm away, macro is pretty cool.


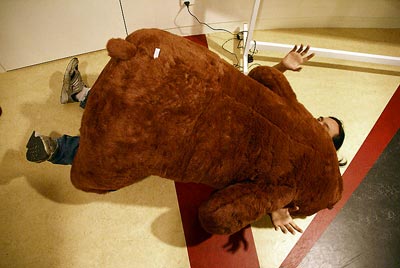
Shooting performances with a 300mm equivalent F1.8 on an infrared-modded camera is great fun, because of how bright infrared modding makes it! This was underexposed by one stop and shot from over 10 feet away from the performers. The camera shot at 1/250th of a second at ISO 100!


Interestingly, stopping down the lens to F2.8 (the lower picture) removes a lot of that infrared tint. It could just be enough to tip the camera’s white-balance over for this effect.


I can also shoot from across the table!


It is truly an intimate lens.

So if I have a Q1 which only does 1600×1200, could I take a picture using a dSLR on a 50mm F1.8 and crop it to the same picture?

The Q1 does 300mm at a crop factor of 6x. A regular dSLR crops at 1.5x or 1.6x. Thus, to get as much detail in that tiny area, you’d need a dSLR with 6400×4800 resolution, which is 30.72 megapixels!

Okay, fine, so a dSLR has a 3:2 ratio (I don’t understand why don’t they get closer to a square, as it uses as much of the image circle with less cropping.) Hence it should be 6400×4267 resolution or 27.3 megapixels to get as much detail in a crop as the Q1.

In case you haven’t figured it out already, I intend to get more lenses of different mounts, and unite them all at the 52mm screw thread. 😀 I can then stick filters between the lens and camera instead of in front of the lens! The exception is the Seagull, where adding any more filters will make it short-focused, so I’d have to get a 49-52mm step-up ring. My only worry is if the Seagull is so old that its front screw thread diameter is 48mm instead!

Why I Don’t Like Using Firefox

So I downloaded Windows Internet Explorer 7.0 and Mozilla Firefox 2.0. I still prefer IE. Why?

Show Picture


(This is a screenshot of IE6, with Show Picture as one of the menu items.)

Firefox is unable to load images by right-clicking and choosing Show Picture. BLOODY ANNOYING! This is especially so on sites which have lots of pictures, where it only loads halfway and gives up. On IE, I right-click and Show Picture on each picture. On Firefox, I have to reload.

Of course, on blogs with permalinks, I open those unloaded ones in a new window, but what about picture galleries?

Image Placeholders

In Firefox, some sites do not show image placeholders. I have no idea what causes this. In about:config, my browser.display.show_image_placeholders is already set to true.

Remember Me, The Proxy Password!


Firefox doesn’t remember my proxy password. It doesn’t even ask if it should remember.

Also, when the proxy server is down, the prompt keeps reappearing and bugging me.

Fanboyism

Why do blogs bother to say which browser was used to comment? Is the credibility of someone dependent on the browser and operating system he/she uses? Keep that trivia to yourself, you geeks. You make me ashamed to be a geek.

(I might as well put a sexuality option in my comment box. Or maybe this function will find better use in Lainie‘s blog.)

Addressing Issues

Whenever I Ctrl-N on IE, it remembers the address; Firefox opens a blank page. However IE7 decided to copy the behavior of Firefox by NOT copying the URL when pressing Ctrl-T. When I Ctrl-N on a page, I want to load another instance of that page (in those sites where they have annoying Javascript navigation bars that won’t let you Ctrl-T on those links, e.g. DPReview.) I then click on the link on the old window.

It’s just an option I wish they had. “Copy address to new window?” How polite.

It’s also useful when pressing Ctrl-N on a pop-up, to see what the address is. But IE7 takes it a step further! You can see the address bar! (It’s not editable, but you can copy the address!)

Transparent Flash

Developers bitch about transparent Flash here.

Make a flash that is transparent, and you won’t be able to click underneath it in Firefox. Very frustrating when you need to click on the HTML forms underneath it!

As for add-ons, I them pure and stock, like Porsches. 😛 Okay, fine, I have the Mouse Gestures add-on for Firefox and Developer Toolbar for Internet Explorer, but that’s it. I keep them simple so I don’t feel lost on other computers which do not have all my favorite add-ons installed.

Compability

Look, you can brag how much your code is correct by whatever standards, but if half the people can’t see it, why bother?

It’s more important to be backward compatible than to follow standards. Exactly which browser (or phone) chokes on a single <br>? Of course, HTML breaks in funny ways if you close your tags in the wrong order, but having to do <br /> is pointless.

I also see loads of HTML coders finding pains with CSS. Why go through all that effort? Use a table and stop bitching about how padding should or should not be. I’ve been using CSS for years now, but sometimes you just need to use good ol’ table work. Or simple hacks like stuffing all of your header into one imagemap. Calling the header image from CSS is just making pains for bloggers who wish to modify templates. I’d just slap a <center><img src=”http://www.glaringnotebook.com/zimages/(the link)”></center>. It works. It still works in Firefox 2.0. It even works in Internet Explorer 4.0. Don’t give yourself a shitting headache.

But sir, <center> has been depreciated!

So have the Scroll Lock and Pause/Break keys, but they’re still on keyboards and still work.

Can your site be viewed in some cybercafe in some remote area?

Memory Hogging


Both browsers consume about the same amount of memory… but wait, what’s that extra firefox.exe doing there?


I then pressed Alt-Home on both (to get both browsers showing only a blank page.) Firefox did not dump its unused memory even after a minute.


It was not until I loaded another page that the memory was properly reallocated. I think my huge amount of pictures brings up the memory usage compared to the Flash-heavy Xfresh. Weird.

Responsiveness

I clicked Firefox 2.0, then Internet Explorer 7.0. IE7 loaded first, FF2 a few seconds later. That’s the thing about Microsoft’s highly-integrated-with-operating-system programs – zippy. That’s why I still use Notepad. It’s instant.

Firefox also tends to stall when I start to download a file. That makes all the tabs unclickable for a while. (Apparently, the download manager should be cleaned often to avoid this.)

Firefox also tends to crash more often, taking all the tabs I hadn’t read to hell. With Internet Explorer, I can still salvage it because it prompts me, and I can type out the address in Notepad. Firefox just disappears.

Nothing does not crash. I’ve crashed a Mac. I’ve crashed Linux. I’ve crashed Notepad. I’ve seen iPods crash. Give me the keys to your Volvo, and I’ll crash it, too. 😀

The Tab’s On Me

IE7 supports tabs now, and it seems a hell lot more responsive than Firefox 2.0 when it comes to multiple tabs. By the third link I Ctrl-click on my links, Firefox stalls. I’ve always been a multiple window surfer, and Firefox greatly disappoints; I’d Alt-Tab in IE, and it would be up sooner.

Also, one thing about IE7’s tabs that I really like; when you open a new tab, it loads to the right of the current tab, not at the far right end of all the tabs. If I wanted to quickly switch to that window, I can Ctrl-Tab there, and Ctrl-Shift-Tab back to where I came from. On Firefox I have to keep Ctrl-Tabbing till I get there, then Ctrl-Shift-Tab till I get back. This option is enabled with “Open new tabs next to the current tab” in Tabbed Browsing Settings.

But hey, I have to use Firefox at home despite it annoying the heck out of me; Internet Explorer 6.0 cannot zoom text that is specified by pixels in CSS (damn you CSS coders who think small text is cool!) I need that zoom for my 19″ CRT on 1600×1200. 😛

Reviews In October

The company I work for gives me 20 days of leave, of which I rarely take. And so, at the end of the year, I do Leave Clearance to avoid it going to waste. That means Tuesdays and Thursdays off for the rest of the year! Yay, I get more time for geeks and chicks. And yeah, free movies.

In retrospect, I wish I could take Fridays off so I could hang out late on Thursday without worry, but the work comes on Friday. I cannot really take two days off in a row because the office would miss me too much, so I take alternate days. The worst part of taking alternate days is that everyday feels like a Monday, coming in after a leisurely day.

IMAX is so real, it’s like Boog really pounced on me.

Open Season has to be seen in IMAX 3D. You’d wanna reach out and pet the bear!

I then saw Robots on ASTRO, and I greatly regretted not catching it in IMAX 3D. The movie was made for IMAX, with all the action sequences.

How does IMAX work? The glasses are two polarizers, one 90 degrees from the other. Same goes for the two projectors; each is polarized differently. The left polarizer cuts out light from the right projector and vice versa. I tested this with my polarizer; turning it would fade between the two images being projected on screen at the moment.

On to more funnies.

Talladega Nights: The Ballad Of Ricky Bobby was alright; there were some great intellectual moments, but there were more slapstick moments. Still, Will Ferrell plays the arrogant uneducated buffoon best in Anchorman: The Legend Of Ron Burgundy. The intellectual moments I love are classic Homer Simpson humor – “Heh Heh Heh! Lisa! Vampires are make believe, just like elves and gremlins and eskimos!

Or, like “How is education supposed to make me feel smarter? Besides, every time I learn something new, it pushes some old stuff out of my brain. Remember when I took that home winemaking course, and I forgot how to drive?” Teehee!

I didn’t expect too much from Talladega, from the trailer, knowing that I would always compare it to Anchorman. Same went for Nacho Libre, which had that pointless stoning at the camera brought by that director of Napoleon Dynamite. School Of Rock was what got me a fan of Jack Black.

I finally saw Saw on Halloween night. Wow.

John Tucker Must Die was good! John’s brother reminded me a bit too much of Heath Ledger in 10 Things I Hate About You, with the cynicism and long locks. If forced to make a choice, I’d pick the girl who played Carrie (Arielle Kebbel), though Ashanti was good. They made Jenny McCartney look real old though. 🙁

Also, this (and Talladega Nights) did not have that annoying bluish digital video tone. Colors were natural and vibrant.

I also managed to catch Frankenstein In Love and was entertained. (Go read the blog, that’s entertaining, too.) Once you stop trying to make sense of things, you get some pretty neat one-liners. I didn’t get how Mary George was a ghost and then a nurse… but then, this play had an excuse to be disjointed; after all, it was about Frankenstein and his mishmash of monsters. Some other plays were much less coherent. I didn’t recognize Ari Ratos, as he wasn’t playing a bumbling idiot! U-En Ng wielded yet another hammer, true to his style. Melissa Maureen also looked a lot smaller than I remember. I wanted to stay and apologize for mistaking her superstar friend as a supporting cast but my friend had to run.

I think I’m Doctor Frankenstein with digital cameras. Wait till I blog about it. (Or see a sneak preview off somebody’s blog.)

Dang Wang II

Here comes the finale to the Dangi Wang Dang Wangi pictures. But first, a trip on the monorail, in infrared, with infinity focus on my Fujifilm Digital Q1 manual-focus infrared-modded camera.


Leave me behind.


Pylon.


The city looks weirdly like a patch growing amongst low-rise buildings.


Stadium Merdeka.


The new mosque near Hang Tuah Monorail. (All these shots on a moving monorail train. Hail the infrared-sensitivity, which gives me a sure 1/2000th of a second exposure, fast enough for all motion!)


I got back in color on my old Canon Powershot A520 for this, from a window in Berjaya Times Square.


Athena is not mirrored.


We headed to Dang Wangi, with a most discriminatory signboard. No rempits!


This was not shot in monochrome. I don’t know how it got this desaturated.


Still standing.


Raymond metering.


They closed the site where we camwhored previously!


There was another still open, but not as appealing.


So we, uh, took pictures of ourselves. *insert CGI sequence zooming in to my camera, to see…*


Grace!


Without an infrared-passing filter, certain objects (like Athena’s bag) absorb infrared, thus reflecting normal light only. The rest is that color because it reflects a lot of infrared.)


It makes for a very cool accidental color-accenting effect. Most black shirts appear bright in infrared, but some don’t and may be used in infrared photography for cool effect.


A stairway near the station. The softness and vignetting are a natural byproduct of the cheap manual focus lens. Digital lomo baby!


Athena took this.


Why’d they rip a shoplot apart, I do not know.


Moss.


Grace the eternal camwhore.


Amazing; the Proton car absorbed infrared.


We then ran to The Bodhi Tree for food as it started dristling and the mosquitoes marked their territory at dawn.


Grace through the 52mm Hoya R72 infrared-passing filter.


Sneak preview of things to come. Grace’s friend Kok Kiong had an Olympus E-500 digital SLR and I got to play with it! While I’d been wondering why their lenses were all so short, like 40-150mm F3.5-4.5, it was justified because the dSLRs had a 2x crop factor. So it would crop (somewhat) like a 80-300mm on film (or around 55-200mm for a dSLR with 1.5x crop factor.) Yep, the viewfinder was dark because of the 2x crop factor. However, the 300mm-like crop was at F4.5! That was brighter than the budget lenses which usually end at 200mm F5.6. Both the 14-50mm and 40-150mm had 52mm screw threads, so you can imagine how small they were. No wait, here’s a picture.


We dashed through the alleys in the rain…


…and reached Dang Wangi LRT station, where, uh, KJ dictates his plan for world domination, and an interested twisted sadistic tyrant listens.