Category Archives: Geek

Ye Optik


Random samplings from lenses from decades ago – the Super-Takumar 50mm F1.4 in M42 mount!


This is what it looks like on the A700. (All shots with the A700 unless otherwise specified, in case you’re wondering about depth of field and field of view considerations.)


Unitor 200mm F3.5 in M42 mount…


…and a random shot of someone sitting far away at a mamak.


My former Industar 61L/Z 50mm F2.8 in M42 mount got real nice and close!


I’m guessing this was at F11.


The Sigma 14mm F3.5 on the A900!


Goes crazily close, too! (As is the nature of wide-angles, needing only to extend a little to get good magnification.)

A 20mm lens, for example, only needs to extend 20mm from its default position at infinity, to focus at 1:1x magnification.


And here’s one from the Minolta 28mm F2.8 on the A900!


Mmm, lovely Minolta 24mm F2.8. I wish I grabbed it for the A900 then. Still, F2.8 is lacking for what I shoot.


The old classic Minolta Rokkor 50mm F3.5 1:2x Macro (which needs an adapter to achieve 1:1x.) Also seen on it is a Minolta MD to Minolta AF adapter (and my Sigma 17-35mm F2.8-4 EX in the background.)


A tiny Tokina 28mm F2.8 in Minolta MD mount.


Another classic, the Minolta Rokkor 50mm F1.4 in MD mount.


Tokina 20-35mm F3.5-4.5, an early ultra-wide angle zoom.


Left is the Vivitar Series 1 100-300mm F4.5-6.7, one heck of a light push-pull, while on the right is my venerable Minolta 70-210mm F4 beercan.


Star power! How?


The cheesy star cross filter.


The Minolta 500mm F8 AF Reflex! Special mention to AF in the name because it’s the only reflex lens in the world that can auto-focus. Light and small for its focal length!


The subject of this picture is the orange out-of-focus highlight from the Minolta 85mm F1.4G – compare this to the somewhat bright-lined Nikkor AF-D 85mm F1.8 and this picture will make sense.


The chunky Tamron 28-105mm F2.8 on my Minolta Dynax 7, the way it was meant to be.


A fungused Minolta 28-85mm F3.5-4.5, one early zoom from the first generation of Minolta lenses (at 28mm F3.5 on the A900.)


This is the 85mm F4.5 end.


And finally, one from the pocket rocket, the Minolta 135mm F2.8.

Another Geekout Session


It’s yet another geekout session with Albert, starting with a night in Titiwangsa Lake Garden.


Interestingly, the Eye On Malaysia has shifted to Malacca!


KJ sits on a power box.


I don’t know what he sees.


This Casio Exilim F1 sees at 60 FPS. No, not video – continuous bursts! Unbeatable for capturing sports action, really!


Size comparison, left to right: Minolta X300 with Seagull 50mm F1.8 lens, Olympus E-420 with Zuiko Digital 14-45mm F3.5-5.6 lens.


Though for me I’m not excited about the Four-Thirds system as much as the Micro Four-Thirds system; here’s the mirror-less Panasonic G1!


Then there’s the Olympus Micro Four-Thirds prototype with a possible 20mm F1.7. SWEET!


Sunpak Auto 16R Pro ring macro flash.


The Canon MP-E 65 5x-1x macro lens on a Canon EOS 50D!


Top pictures are the lens at 1:1x magnification; bottom pictures are the lens at 5:1x magnification.

It’s not an easy lens to use – changing the magnification then requires you to change distance, too. It’s basically a 65mm F2.8 on a variable extension tube. Interestingly, the Minolta 3x-1x uses a 50mm F1.7 and has auto-focus…


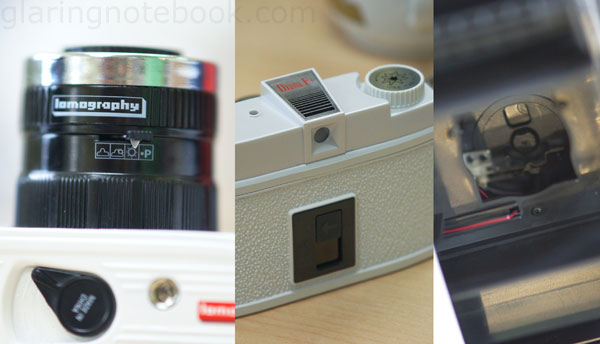
And now rewind to the plastic Diana F+! Interesting that it has focus control.


Left to right: I’m guessing the icons really represent apertures from F8/F11/F16/F22; the film indicator switch tells you it’s 120 medium format; the internal parts are all plastic.


Here’s another medium format camera, the Pentacon six TL!


Fitted with a Carl Zeiss Biometar 80mm F2.8 lens, which is a normal lens on medium format, similiar to 50mm on full-frame 36x24mm.


Shot with the Minolta 70-210mm F4 beercan at 70mm F8.


I tried holding the Biometar in front of my A700 and focusing manually.


I then tried to tilt the lens upwards to give a shallower depth of field. Of course, the light leaking in from below would cause this loss of contrast and add flare…


This was a far more challenging shot at 80mm F2.8 – it was tilted downwards. Note what is in focus.

And now, for a gratituous set of pictures of lenses to show relative size comparisons!


Left to right: Minolta 85mm F1.4G, Minolta 24-105mm F3.5-4.5 (D), Minolta 35mm F1.4G, Vivitar Series 1 28-105mm F2.8-3.8, F&N canned drink.


Left to right: Minolta Dynax 7 with Minolta 85mm F1.4G, Nikon D700 with Nikkor AF-D 85mm F1.8.


Left to right: Sony Alpha 200 with Sigma 30mm F1.4 EX DC, Sony Alpha 300 with Minolta 85mm F1.4G.


Left to right: Minolta 135mm F2.8, Minolta 28-85mm F3.5-4.5.


Left to right: Minolta 28-70mm F2.8G, Sony Carl Zeiss Vario-Sonnar T* 24-70mm F2.8 SSM ZA.


Left to right: Sony 18-70mm F3.5-5.6 DT, Sony Carl Zeiss Vario-Sonnar T* 16-80mm F3.5-4.5 DT ZA. Honestly I expected the Zeiss to be a lot bigger.


Left to right: Sony Carl Zeiss Vario-Sonnar T* 16-80mm F3.5-4.5 DT ZA, Sony 16-105mm F3.5-5.6 DT.


Left to right: Sigma 17-70mm F2.8-4.5 DC Macro, Sigma 18-50mm F2.8 DC Macro. Both focus to a crazy close 20cm but the 17-70mm has the advantage of focal length to achieve a magnification of 1:2.3x!


Left to right: Peleng 8mm F3.5 circular fisheye in M42 mount, Minolta 50mm F1.4 (in A-mount), Jupiter-9 85mm F2.0 in M42 mount.


Left to right: Sony Carl Zeiss Sonnar T* 135mm F1.8 ZA, Sony Carl Zeiss Planar T* 85mm F1.4 ZA, Sony Carl Zeiss Vario-Sonnar T* 24-70mm F2.8 SSM ZA, Carl Zeiss Jena Flektogon 35mm F2.4 in M42 mount, Sony Carl Zeiss Vario-Sonnar T* 16-80mm F3.5-4.5 DT ZA. It was a pity that we could not get the Sony Carl Zeiss Vario-Sonnar 16-35mm F2.8 SSM ZA to join this party!

PF20XD 135STF E30 G1 3518DX


Albert returns with a chock-ful of photogeeking!

Yes boys and girls, this is my flash triad – from left to right, the Sony HVL-F42AM, Sony HVL-F58AM and the newly bought Sunpak PF20XD!


And here’s a less flashy picture – from left to right, my Nikon SB-28 (dynamite edition), Sony HVL-F42AM, Sony HVL-F58AM and the Sunpak PF20XD in front.


The rear is very simple – A1/A2/A3 is auto exposure, and the sync mode can be set to skip the pre-flash. I’m not sure if it skips the wireless signal from an Alpha pop-up flash simply because I don’t have an Alpha pop-up flash on my A900 to test this with.

Which is why I got this flash in the first place – as a replacement for my missing pop-up flash. This one of course is more powerful, dishing out 20 meters at ISO100.


Here it is mounted on my Minolta X300 – yes, it’s the standard ISO hotshoe mount, with 2 pins just to trigger the flash. So it’s not a Canon-mount or Nikon-mount flash!

It has a built-in diffuser which can be pulled up, which supposedly covers a 24mm focal length on full-frame, but…


…it amazingly reaches to the sides on my Peleng 8mm F3.5 circular fisheye!

I will be bringing this little baby to the clubs where the F42 is simply too big. Bouncing light with the F58 and fisheye is not easy, either! So I might as well go for direct and blend in ambient light. It looks good enough anyway!


Also spotted at the same shop, dSLR in Subang Parade, was this mega-pack! The Olympus E-520 with the ZD 9-18mm F4.0-5.6, ZD 14-42mm F3.5-5.6, ZD 40-150mm F4.0-5.6, ZD 70-300mm F4.0-5.6! Only thing missing was the ZD 25mm F2.8.


And then I headed to Sony Style KLCC to find the Sony A700/A900 remote, the RMT-DSLR1!

The case of the manual-focus only Minolta/Sony 135mm F2.8/T4.5 Smooth Transition Focus (STF) lens


I’ve always wondered why the Minolta/Sony 135mm F2.8/T4.5 Smooth Transition Focus (STF) lens was manual focus only. So, I decided to test this theory by mounting it on my Minolta X300!

First I had to keep the aperture blades open, so I stuck some tape to hold the lever in place. As you can see, inside the lens, the edges are gradually darker due to the apodization filter inside.


Then, I positioned the lens and body together, with an eraser and CF card holder to keep the lens from rolling.


I looked through it, and it confirmed my theory – the upper half and lower half of the split prism would never match due to the gradual darkening coming from opposite ends!

This is due to the apodization filter which darkens the periphery of the lens (giving the beautiful bokeh that the STF possesses.) Obviously, the top half is looking through the right side of the lens while the bottom half is looking through the left side of the lens.

Phase-detect auto-focus works in a very similiar way to a split-prism on a manual-focus viewfinder – it looks at the subject from two opposite ends of the lens and drives the lens to focus so that the two images are aligned.

If you’ve tried a darker lens on a split-prism viewfinder, you might find that one of the two halves will be darker than the other – this just means that your eye is not centered in the viewfinder, so you need to move slightly to your left or right until the brightness matches. However, you would never see a gradient darkening with a non-STF lens!


This is what an out-of-focus picture looks like through a split-prism viewfinder. You need to focus the lens by turning it until the top and bottom halves of the split-prism align.

This will be easiest to focus on vertical lines and almost impossible with horizontal lines!


I then tried to see if the gradient darkening happened with a normal lens by moving the camera left and right of the viewfinder – it didn’t. Instead, one half got uniformly darker than the other.

Of course, on an phase-detect auto-focus system, the ‘eye’ never actually moves left and right, and it’s always aligned on the center.

So how does a regular phase-detect auto-focus system work?

Each AF sensor has two lines of sensors – one line of CCDs that sees the upper half, one line of CCDs that sees the lower half. It can see how ‘far’ each line is from each other, and know immediately where to focus the lens.

So, the lens is driven to the focus point, and then the camera looks at the two halves again and makes micro adjustments.

Cross-type sensors

Cross-type sensors are just a pair of line sensors at 90 degrees from each other, so it is sensitive to both horizontal and vertical detail.

So why doesn’t the STF work with auto-focus?

As you saw earlier, the top and bottom halves have a gradual darkening coming from opposite ends. So, even if the object was in focus, the CCDs will never say it’s a match!

A way that might’ve worked is that the camera knows that the STF is being used, and compensates for the gradual darkening when comparing what the two CCDs see.

My guess is that the gradual darkening differs with focus range and aperture setting, so it might’ve been too complicated for Minolta to program into the bodies when they first released the STF.

So what’s the big deal about the STF anyway?


Sony 135mm F2.8/T4.5 STF at T4.5. Note how the out-of-focus highlights are circles with gradually darker edges.


Minolta 50mm F1.4 at F1.4 (cropped to give the same angle of view.) Note how the out-of-focus highlights have ugly, distracting borders (especially at the bottom of the picture.) These borders are called bright-line bokeh.


Here is another example also from the 50mm F1.4. The lights on top really should be out of focus and thus not distracting, but they pop out of the background!

Of course, the 50mm F1.4 and Minolta 50mm F1.7 are very poor examples – a lot of old Minolta zooms and primes have much better rendition of out-of-focus highlights.

And in other news…


And now, on to the Olympus E-30! I found out why it’s said to be the poor man’s E-3.


They still had the clunky way of adjusting Kelvin WB in Live View (an immensely useful feature) but it was slightly easier to hold down the EV button while rolling the rear dial now.


How about the DCIM Show that happened recently at Midvalley Megamall?


Disappointing. No, not the Panasonic G1 – the lack of anything really fresh, new or upcoming. The Panasonic GH-1, with honestly the best implementation of video in a digital interchangeable lens system, was not there.

The GH-1 has an external gun mike, a Wind Cut function, fast AF tracking while recording videos (like a proper camcorder) and a lot of other things that make the Canon 500D’s video mode even more of a joke.

Oh, and Canon didn’t have the Canon EOS 500D there, either!


Fortunately, Nikon brought some cool stuff, like the Nikkor 24mm F3.5 tilt-shift!


Then there was the magnificent Nikkor AF-S 200mm F2.0 VR…


…and the diminutive Nikkor AF-S 35mm F1.8 DX.


I then spotted a Minolta 80-200mm F2.8G, in black! This is not the HS version which is white.


People then spotted my Fujifilm Digital Q1 infrared-modded interchangeable-lens camera!


This is what a fish sees when they see a photographer.


The Panasonic FZ-28 has a Kelvin WB setting! SWEET!

(The Canon 500D and Nikon D60 both do not have Kelvin WB settings, sucks to be them…)


Step up for the model shoot challenge!

Playing Guitar Hero is choosing the devil!


Yes, that’s what Harian Metro says on the front cover. Full article here (thanks Silencers for the find!)

There is also a bit with a psychologist from UITM here. He does not mention anything about choosing the devil before playing.


I don’t know about devils, but this guy here could be a pirate. He’s playing Guitar Hero using a gamepad, instead of the original Guitar Hero controller guitar that comes with the game!

Or he could be a cheapskate, buying only the game, which is possible, but is no fun.

Tou simply can’t choose the devil. Unless you confuse King Diamond or Lars �mla�t for the devil. Lars is just a black metal dude, that’s all!

Ironically, the game lets you choose the God Of Rock but not a devil.

You also battle the devil in Guitar Hero 3 with Steve Ouimette – The Devil Went Down To Georgia (which is a devillishly hard song.) Funny thing is, Charlie Daniels, who wrote the song, says the devil very often wins in his blog. Which is quite… true, since it’s one of the two hardest songs in the game!

Speaking of which, here’s the original.

Tamron/Sigma/Sony/Minolta 70-200mm F2.8 Shootout

A quick and dirty F2.8 full-frame telephoto zoom lens comparison for Alpha mount!


Click here for large version.

The big guns, left to right, arranged in order of MFD:
Minolta 80-200mm F2.8G HS APO, 1.8m MFD – Asyraf’s copy
Sony 70-200mm F2.8G SSM, 1.2m MFD – Nic’s copy
Sigma 70-200mm F2.8 EX DG HSM Macro, 1.0m MFD – Sham’s copy
Tamron 70-200mm F2.8 Macro, 0.95m MFD – shop copy
Sony Carl Zeiss 135mm F1.8, 0.72m MFD – my copy

I didn’t bring my lens hood. 🙁

* MFD = Minimum Focus Distance

All tests done with a Sony Alpha 900 firmware Version 1.00. The A900 seems to make the Sony 70-200mm F2.8G SSM focus faster, subjectively, but at the same time it is hampered by the smaller AF sensor layout. Regardless, the AF assist sensors and the F2.8 dual-cross type center sensor should bring out the best in the worst conditions, namely an indoor flourescent-lit shopping mall!

We were time-limited; the shop was closing soon, and unfortunately we’d rarely ever get to see such a full combination of 70-200mm F2.8 lens ranges.

Settings – Standard Small JPG, DRO Off, ISO1600, F2.8 (or F1.8 on the Zeiss), AWB, Multi-segment metering, center spot AF, AF-C.

We did a comparison with a moving target, in this case a friend walking towards us. I attempted to keep the center spot AF point on the eye of the moving subject.


Tamron 70-200mm sample walk.

Lens Name; number of shots; good/bad shot ratio *

Tamron 70-200mm F2.8 Macro; 14 shots; 8:6
Timestamps: 8:54:40 8:54:40 8:54:40 8:54:40 8:54:40 8:54:42 8:54:42 8:54:42 8:54:42 8:54:44 8:54:44 8:54:44 8:54:44 8:54:44 8:54:46 8:54:46 8:54:46 8:54:46

Sigma 70-200mm F2.8 EX DG HSM Macro; 12 shots; 5:7
Timestamps: 8:55:26 8:55:28 8:55:28 8:55:28 8:55:28 8:55:30 8:55:30 8:55:30 8:55:30 8:55:30 8:55:32 8:55:32

Sony 70-200mm F2.8G SSM; 13 shots; 6:7
Timestamps: 8:56:52 8:56:54 8:56:54 8:56:54 8:56:54 8:56:54 8:56:54 8:56:56 8:56:56 8:56:56 8:56:56 8:56:58 8:56:58

Minolta 80-200mm F2.8G HS APO; 17 shots; 8:9
Timestamps: 9:00:14 9:00:14 9:00:14 9:00:14 9:00:16 9:00:16 9:00:16 9:00:16 9:00:16 9:00:18 9:00:18 9:00:18 9:00:18 9:00:18 9:00:20 9:00:20 9:00:20

Sony Carl Zeiss 135mm F1.8; 14 shots**; 9:5
Timestamps: 9:00:52 9:00:54 9:00:54 9:00:54 9:00:54 9:00:56 9:00:56 9:00:56 9:00:56 9:00:56 9:00:56 9:00:58 9:00:58 9:00:58

Number of shots were derived from comparing magnification; magnifications outside the norm were discarded.

Interesting that the timestamp of the file may not be truly representative of the time it was taken; I reckon the A900 writes to the card every 2 seconds, or that it can’t count in odd seconds. So there goes my plan to use the timestamps to show how fast it can focus!

* good shots meaning it was obvious that the lens managed to cope up and focus (some shots had motion blur so I accounted for that as you can still see the relative region of focus); bad shots meaning it was obvious that the lens didn’t manage to keep focus and you’d want to delete that shot.

** 14 shots on the Zeiss are not comparable because of the different start/stop points; I cannot measure this versus the other lenses because they don’t have the same magnification so I can’t measure the start/end points easily.

My Subjective Opinion


(Click for larger view.)
Tamron at 200mm F2.8 1/125s ISO400. This is not a picture of me!

I will assure you that the Sigma at 200mm F2.8 and this close range (on the A900) will not give you this amount of sharpness. The Tamron without a doubt is good at 200mm F2.8 in the 1-2 meters range (estimated) where the Sigma falters.

My previous findings on the Sigma here.

The Tamron 70-200mm F2.8 and Minolta 80-200mm F2.8G HS APO, both being screw-drive lenses, let the A900 fire away more frames at the beginning of the walk. It focused more confidently. There was an obvious audible difference between the 5 FPS of screw-drives and the slower, more hesitant pauses between HSM/SSM lenses. Everybody noticed this.

Given the low sample rate I have here, I hope somebody out there can take this further especially on the 200mm end – the shop confines didn’t allow for 200mm tracking. That said the test was very gruelling on the lenses as it is in poor flourescent lighting so I cannot imagine how it would fare at 200mm. I would imagine that all these lenses would do much better in a daylight drag race at 200mm!

Approaching the minimum focusing distance all lenses struggled mainly because of the A900’s small AF sensor layout.

The Minolta 80-200mm F2.8G HS APO’s MFD of 1.8 meters makes itself very apparent in the confines of a shop. Modern lenses do 1.2 meters at least which is great! The Sony 70-300mm F4.5-5.6G SSM is another excellent example, going 1.2 meters close too, a record for any lens that gets to 300mm! Of course, the Minolta 70-210mm F4 beercan has been focusing 1.1 meters close since 1985…

Of course, in the name of science, all tests should be done 3 times. But we didn’t want to agitate the very nice shopkeeper who let us test this lens. And this was gonna be quick and dirty, not precision. I think a much more precise method would be with the camera on a tripod trying to track a (weighted) racecar with a bright contrasty plastic cone (for a flag) on a track, heading towards the camera in a straight line before turning off.

70-135-200mm comparison

I focused on the S of the Sony A700. Unfortunately this was not a tripod-mounted test!


(Click for larger view.)
Left to right: 70mm, 135mm, 200mm all at F2.8
Top is Tamron, bottom is Sigma. It seems the Tamron has corrected for longitudinal chromatic aberration, or color ‘bokeh’. It looks odd to me though since I’m so used to LCA and regard it as a natural property of lenses.


(Click for larger view.)
Left to right: 70mm/80mm, 135mm, 200mm all at F2.8
Top is Sony, bottom is Minolta.


(Click for larger view.)
Zeiss at 135mm F1.8.


(Click for larger view.)
Left to right: 70mm, 135mm, 200mm all at F2.8
Top is Tamron, middle is Sigma, bottom is Sony.


(Click for larger view.)
Zeiss at 135mm F1.8.

The Sigma and Tamron have much more obvious spherical aberration. I thought the Tamron was alright at 135mm and a heck lot better than the Sigma at 200mm and close focus (1-2 meters.) The Sigma has very obvious softening!

Stuff I Did Not Compare

Color – I was in flourescent lighting. 🙁

Bokeh – the shop people kept moving about so the background changed quite a bit as you can see.

Magnetic Mouse!

My new mouse, the A4Tech NB-57D, is a battery-less mouse which gets power from magnetic induction generated by the magnetic fields of the mousepad!

I have always loved A4Tech for their very innovative ideas, like one of my beloved wireless mice from way before – to charge it, you’d just plug the USB charger into the head of the mouse (in effect, making it a wired mouse.) The thing that was different though, was that the plug was a standard classic Nokia charger plug! So, I could charge my Nokia when not charging my mouse… and, the mouse took rechargeable AAA batteries, so it was also a USB AAA battery charger!

Such genius, and yet they discontinued it (possibly Nokia sued?) so their later mice were all charged by docking, which is a very stupid place for a mouse to be in.

I had seen this magnetic-field powered mouse before years ago, but it had a label that said not to bring it within a certain distance of CRT monitors to prevent interference. I still use a 21″ IBM 6558 P202 for its superb color and gamma (I dislike the unnatural gamma of LCD monitors.)

And so, when my current mouse could not middle-click consistently, it was time to get a new one.

When I saw the box, it didn’t have any indication that it was incompatible with CRT monitors. Was this a new packaging where they assumed that CRTs went extinct? But then, the packaging said it was compatible with Windows XP and below. There was no sign of Windows Vista. So it could be old enough to exist before Windows Vista while having fixed the problems with CRT monitors.

Oh well, a gamble it was then.

So did it interfere? Yes it did, causing tiny black lines which disappeared after I removed the mousepad from the surface of the screen. So it wasn’t a problem at all.

And how about the mouse? It was smooooth! The mousepad had a very nice texture with a slightly slippery feel. I played a Tier of Quake 3 and it didn’t let me down at all.

(This is not a sponsored post – I am honestly marvelled by A4Tech’s innovations.)

Oh and how many of you can name the good use of a middle-click? Yes, you can click down on your scroll wheel!

I asked around, and the most popular response, was of course, to make an auto-scroller. (There was also a very sad person who did not know you could middle-click.)

However, about nobody knew that middle-clicking on a link in Internet Explorer 7/8 or Firefox would open the link in a new tab. There you go you’ve learnt something new today!

Why was this a big deal? I was middle-clicking on links in emails using my previous mouse, not realizing it wasn’t working, and then deleting those emails…

Some Burst Of Pictures!


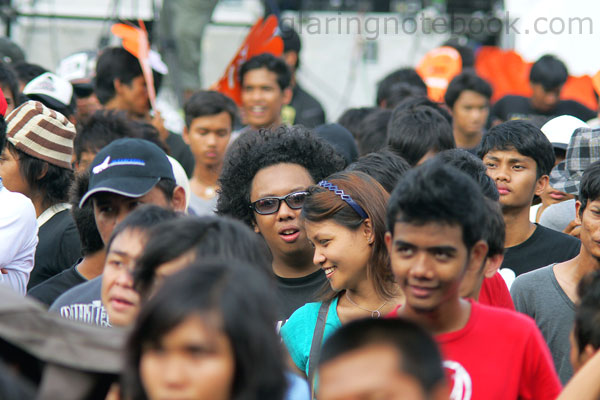
Here goes some random crowd shots from Sunburst 2009! (Yes, my camera was authorized but it was horribly inconvenient for the kids who took the bus all the way from Ipoh to come see KoRn only to be told they couldn’t bring in SLRs.)


Captain’s Log, 21st March 2009 Anno Domini, haha get it Captain’s Log, a line out of Star Trak.


My camera obviously has a bike fetish.


I see primarily 3 colors in this photo.


Here’s the obligatory Sony Carl Zeiss Sonnar T* 135mm F1.8 ZA advertisement, although I am not paid to do this.


Checkout her shades yo!


A different kind of shade.


It looks so transformable, if I was 6 I would go up and transform it.


The VIP area offered little drinks, Pepsi, mineral water, alcohol and finger food. I was more excited about the typical concertgoer’s Ramly Burger meal. Only thing nice about this place was of course, proper toilets!


Gee, which stage to next?


On the big Sun stage, I spotted a Nikkor AF-S 200mm F2.0 VR on a Nikon D3! 300mm F2.8s don’t hold any special interest with me anymore, while this rare 200mm was notable. Interestingly, very few Nikon users have seen or touched the Nikkor AF-D 135mm F2.0 Defocus Control, which my colleague was interested in!


Out in the field was a classic – the Sony Cybershot DSC-F828 with a Carl Zeiss lens.


Of course, Jenifer is far more enthralled with my Peleng 8mm F3.5 circular fisheye!


Out in tents, the Livesounds and Loud & Clear stages are opposite each other.


Justin explains something to me while his colleague chimps a shot with my Zeiss.


OMGITSLIYANAESTRELLAAIAAAAAIIIYEEEESOCUUUTE!!!


Screen resting.


Kellster is the new Fun-Size.


…well I was not going to wait for the wind to blow harder to get a cooler shot.


Wazzaaa Azza!


I spy in your little eye…


I contemplated getting KFC instead.


Flash at 24mm, lens at 8mm. Obvious spotlighting effect will occur!


Mmm Sicilian/Malay mixed light-spinning twins!


The mighty sweaty Alfred captures me and drags me into the Stargate.

Thanks Hayley for taking this shot. I think. Well I thought it was you in that location behind the camera.

Rock The Crowd 8


Shots of the crowd, of Rock The World 8, 20th December 2008 (always very near to my birthday as tradition!)

Shot, of course, with my birthday present to myself, the Sony Carl Zeiss 135mm F1.8 on the A900, at F1.8.

I also borrowed smashpOp‘s Minolta 28mm F2.8 – it would be the widest lens I’d bring, next to the Minolta 50mm F1.4. Much smaller than my Minolta 24-105mm F3.5-4.5 (which already was tiny!) The next few pictures are from the 28mm…


25 and a day old. Thanks Ahmad Saiful for taking this picture! (Er, why slanted ah boss?)

I was the sole representative from Xfresh that day. No Street Surfers, no nothing. Xfresh was one of the big logos on the Rock The World 8 logo! Thus, by association, I was one of the big logos…


Jambu, or guava. I love this!

Jambu is also a colloquial term for a guy who is so good-looking he attracts guys.


Ramly Burgers, the staple diet of concert goers in Malaysia. I love this, too!


Somebody in this picture has eyes on the back of his head.


Girls leaving, after finding out that Coldplay is not playing.


That’s alright, us guys will stay to rock! Next few shots are with the Carl Zeiss 135mm F1.8… at F1.8.


Minor CA was apparent in this shot, but easily remedied with a duplicated layer, Gaussian blurred with a small radius, then merged with Color blending mode.


The Zeiss is so blistering sharp wide open, on the original shot I can make out what time it is on his watch.


Gotta love the separation! See the Xfresh logo in the top-right corner? That was apparently just me, heh!


More crowds at F1.8.


I then put on the Kenko 2x teleconverter, to get a 280mm F3.5 lens.


Eh cool ‘fro, bro! 280mm F6.3.


Then I whipped out the 50mm at F11 for a crowd-surfing shot. I pity the guy who just went down. Look for his shoe!


Now you see it? I pity the guy who got uh… kicked in the groin.


Moving on!


Wide open, the 135mm F1.8 + 2x teleconverter = 280mm F3.5 wields passable results, with some minor artifacts, like the spherical distortion at the bottom. It’s alright for portraits though!


Back without the teleconverter and just the Zeiss 135mm at F1.8, we have Aru of Republic Of Brickfields and the crowd!

I was denied access to the stage at first, with ROTTW photographers getting full priority. But hey, I represented one entire part of the logo!


Fadhil the emcee, lost in the crowd.


Remember when you were a kid, and getting lost in a crowd would make you cry?


Sometimes, we never find the way.

Haha just kidding but Fat Boys Records should pay the soundman more! (He’s not a random bum, spot his tag!)


Getting up on stage was no big deal – the angle wasn’t great anyway. I expect to see a lot of side shots since the photographers could not move to the front or risk tripping on sound monitors and lights.

The real keepers were from the front, on a raised platform to the side.


Kids these days love posing.


They also love not finishing their drinks, and leaving them on random tables.


Guess who I spotted! Yes, Ted tapes up his camera identification too…

Let the pictures do the bragging, not the label on your camera.


And soon, it was night!


We continued to rock on!


28mm F2.8 1/13s ISO6400. I love how the plastic cups glowed in the light!